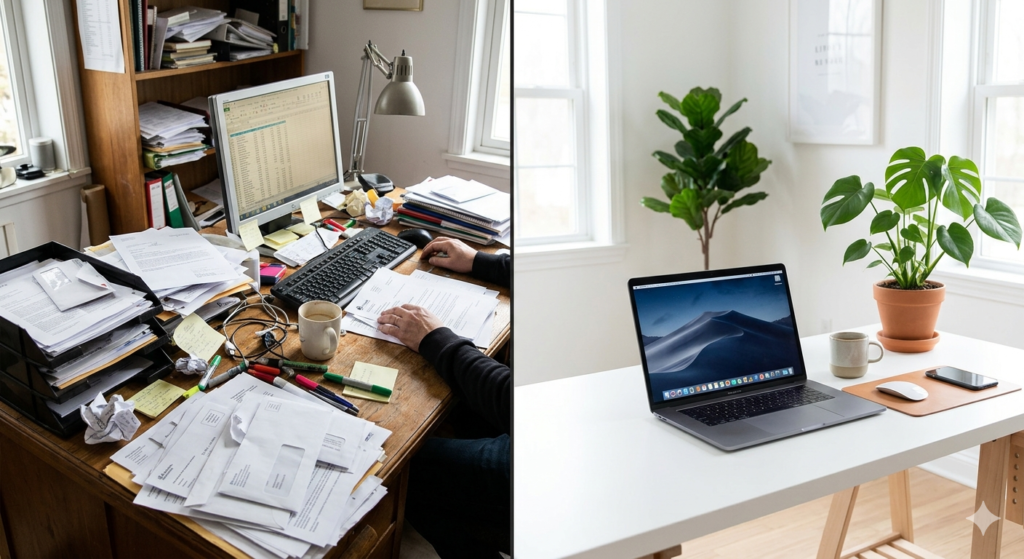
Kitchen counters buried under stacks of mail, filing cabinets overflowing with decades-old tax returns, and sticky notes clinging to every surface. For many households, managing physical paper is a massive drain on both time and physical space. When you need a specific medical record or an appliance warranty, searching through these physical stacks becomes a highly stressful scavenger hunt.
Transitioning away from a physical archive solves this problem. A digital workflow allows you to carry your entire filing cabinet on a smartphone, making any document instantly searchable. This comprehensive guide will show you how to go paperless at home, detailing the exact steps to stop the inflow of junk mail, digitize your existing records, and organize your home office for maximum efficiency.
What Does Going Paperless Mean?
Before buying any hardware or deleting any files, it is crucial to define the end goal of this lifestyle change.
Going paperless at home is the process of eliminating physical paper from your daily life by digitizing existing documents, opting for electronic billing, and utilizing digital note-taking tools. This transition creates a centralized, searchable digital filing system that reduces physical clutter and environmental waste.
It is important to note that going 100% paperless is nearly impossible. Government agencies and certain legal processes still require physical signatures or raised seals. The goal of this setup is to achieve a 95% paperless home, digitizing the bulk of your information while safely storing a small, manageable folder of essential hard copies.
Step 1: Stopping the Inflow (Reducing Paper Clutter)
You cannot successfully empty a flooding bathtub while the faucet is still running. The very first step in reducing paper clutter is stopping new paper from entering your home.
Start by auditing your physical mailbox for one week. Make a list of every company that sends you a physical bill or statement. Then, log into your online accounts for your bank, utility companies, internet provider, and insurance carrier. Every major institution has an “Opt-in for Paperless Billing” toggle in their account settings.
Next, tackle the junk mail. In many countries, you can register your address with national “Do Not Mail” lists or opt-out services provided by consumer credit reporting agencies to stop pre-approved credit card offers. These two actions alone will eliminate over half of your weekly household paper waste.
Step 2: The Hardware for Scanning Documents
Once the inflow is managed, you must address the historical backlog of paper sitting in your home office. The method you use for scanning documents depends entirely on the volume of paper you need to process.
If you only have a single drawer of important files, your smartphone is the perfect tool. Both iOS and Android have built-in document scanners inside their native “Notes” or “Drive” applications. These apps use your phone’s camera to automatically detect the edges of a document, correct the perspective, and save it as a flat, readable PDF file.
However, if you are attempting to digitize ten years’ worth of business receipts, medical histories, and tax returns, you will need dedicated hardware. A standalone “Automatic Document Feeder” (ADF) scanner can process 30 to 50 pages a minute, scanning both the front and back of the page simultaneously. While an upfront investment, an ADF scanner turns a month-long chore into a weekend project.
Step 3: Building a Digital Filing System
A scanned document is practically invisible if it is not filed correctly. Replacing a messy physical drawer with a messy “Downloads” folder does not solve your organizational problems.
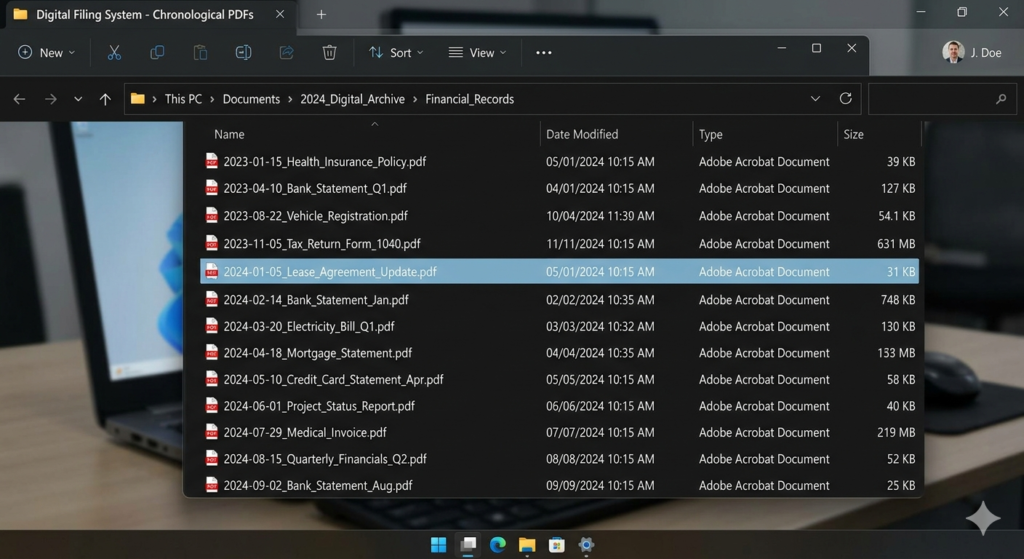
Proper home office organization requires a rigid, predictable folder hierarchy. Create a master folder named “Home Cabinet” and divide it into broad, immutable categories. A standard setup includes folders for: Financial, Medical, Auto, Property, and Legal. Avoid creating overly specific folders (like “2019 Dentist Receipts”), as deep folder trees take too long to click through.
The secret to a robust digital filing system is your naming convention. Never leave a file named Scan_0014.pdf. Always rename the file immediately using the YYYY-MM-DD format, followed by the vendor and the document type. For example: 2023-10-15_StateFarm_AutoInsurance_Policy.pdf. Because computer operating systems sort numbers chronologically, this naming convention automatically organizes your files in perfect timeline order, regardless of what folder they are in.
Step 4: Storage, Security, and Shredding
The final step is deciding where these digital files will live. Storing them exclusively on your laptop’s hard drive is highly risky. If the computer is stolen or the hard drive fails, your entire life’s records are gone.
To ensure safety, sync your master “Home Cabinet” folder to a reputable cloud storage provider. This satisfies the golden rule of data backup: keeping an off-site copy of your files. This also provides the added benefit of allowing you to pull up your child’s vaccination record or your auto insurance policy directly from your smartphone while away from home.
Finally, you must dispose of the original paper. Do not simply throw bank statements or tax returns into the recycling bin, as this exposes you to identity theft. Invest in a cross-cut paper shredder to destroy any documents containing your Social Security Number, banking details, or sensitive medical information.
Conclusion
Learning how to go paperless at home is not a project you finish in a single afternoon; it is a fundamental shift in how you manage information. By systematically stopping the influx of new mail, investing the time to scan your backlog, and adhering to strict file naming conventions, you can completely transform your home office.
The result is a clean, minimalist physical space and a highly organized digital database. You will reclaim the hours previously spent rummaging through filing cabinets, gaining the peace of mind that comes with knowing every important document is exactly where it belongs.
Frequently Asked Questions (FAQ)
1. Is it legal to keep tax documents digitally instead of physically?
Yes. In most jurisdictions, including the United States, the IRS accepts digital copies and scanned receipts as valid proof for tax purposes. The digital copy must be legible and accurately reflect the original document.
2. Which physical documents should I NEVER shred?
You must keep the physical originals of vital government and legal documents. This includes birth certificates, death certificates, marriage licenses, passports, Social Security cards, vehicle titles, property deeds, and original signed wills. Store these in a fireproof safe.
3. What is OCR, and why is it important for scanning?
OCR stands for Optical Character Recognition. It is software that “reads” the text inside your scanned image and turns it into readable, selectable text. Scanning documents with OCR enabled allows you to search for specific words (like “furnace repair”) using your computer’s search bar, making retrieval instantaneous.
4. How do I maintain a paperless system long-term?
The key to maintenance is an “inbox” routine. Keep a small physical tray on your desk for the few pieces of paper that still enter your home. Once a week, take five minutes to scan the contents of the tray, file the digital copies, and shred the physical paper.
5. Does going paperless save money?
Absolutely. While there is an initial time investment, you save money long-term by eliminating the need to purchase printer ink, printer paper, stamps, envelopes, and physical filing cabinets. Furthermore, many utility companies offer small monthly discounts for enrolling in paperless billing.